

How to use AI to determine the sender’s intent from Office365 emails
Inbound email Inbound still drives a shocking amount of work inside most companies. Examples you’ll recognize:
- “Please quote 250 EA of PN-4321.”
- “Attached is PO‑98765”
- “What’s the status on order 12345?”
- “Send tracking for yesterday’s shipment.”
If a human must open each message, interpret it, save attachments, run a script, and route folders, you lose hours and introduce errors.
Classifying the intent of each email the moment it arrives unlocks automation. Your flow can branch to send quotes, process purchase orders, trigger status lookups, and more—consistently and at scale.
What you’ll build
A Microsoft Power Automate cloud flow that:
- Reads new emails
- Converts HTML to text
- Uses an LLM prompt to categorize the message
- Parse the JSON response from the LLM
- Gates on confidence
- Switches on intent
- Takes appropriate actions based on the sender’s intent
Prerequisites: Microsoft Office 365 Outlook and Microsoft Power Automate Cloud
High-level-flow
Trigger → HTML to text → Run an AI prompt → Parse JSON response → Condition (confidence) → Switch (intent) → Per-intent actions
Step-by-step
1. Create the flow and set the trigger
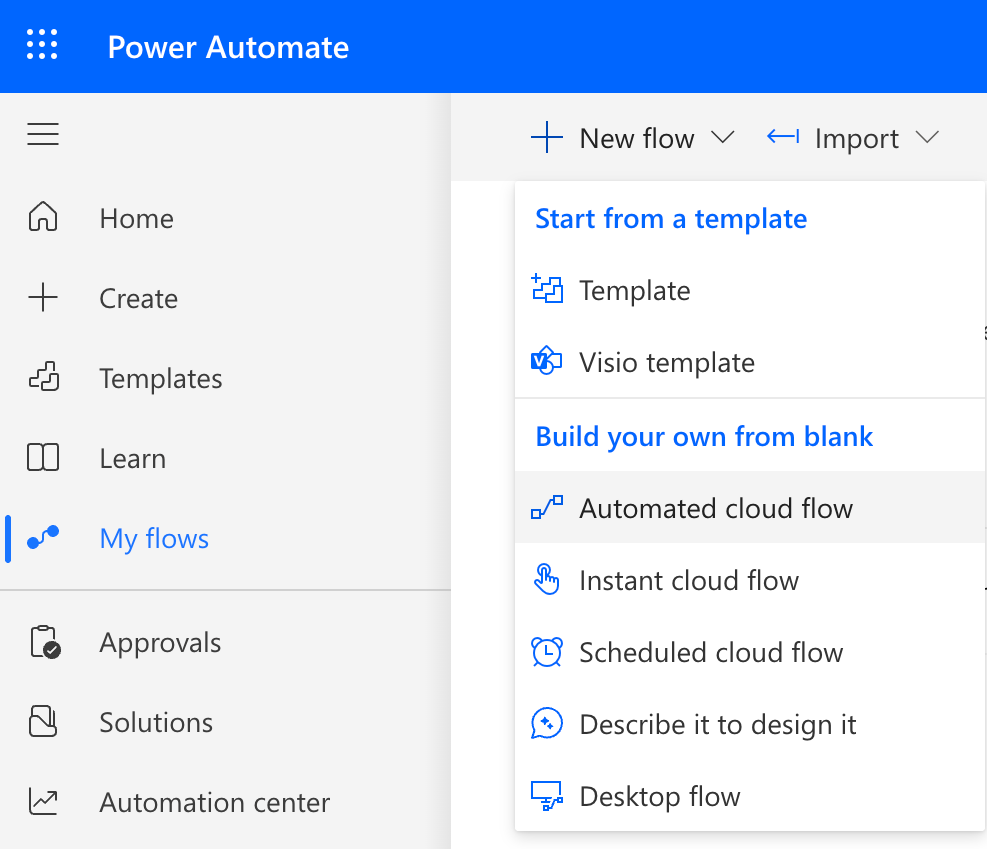
In Microsoft’s Power Automate, select My Flows and then New Flow – Automated cloud flow:
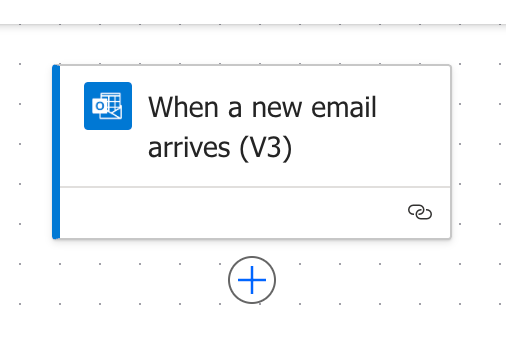
Give the new flow a descriptive name, and choose the trigger: When a new email arrives (V3). Click Create.
The flow will be shown in Map View:
Click the first (and only) action shown in the Map View of the flow to reveal the Settings panel, which will usually appear on the left side of the screen.
Select Folder under the Advanced parameters dropdown list and select the email folder that you are interested in having the trigger action monitor (usually Inbox).
Set any other Advanced parameters that might apply for your automation. Another common parameter that is changed is the Include Attachments parameter, it is often set to Yes.
2. Convert the email body to text
Emails are often sent in HTML format. The automation will be more reliable if we convert the body of those emails to text.
Add a 2nd action by clicking the “+” button below the first. Search for the action named Html to text and click it to add it to the flow.
In the Settings panel for the new action, click in the Content box, then click the blue lightening icon to insert dynamic content.
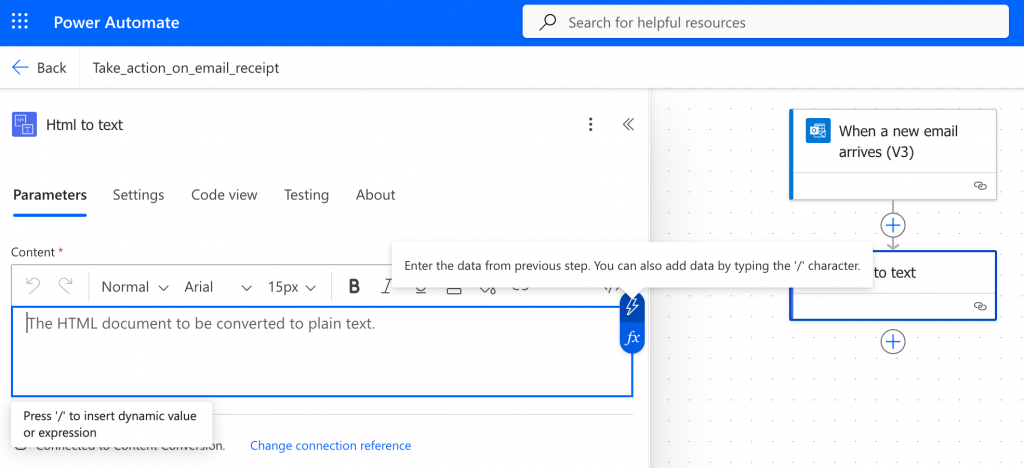
A list of available dynamic content will appear. From the list of dynamic content, select Body from the previous step.
Tip: There are quite a few outputs from the previous step that are not shown. If Body is not listed, click See More to see the additional dynamic content options.
This will cause the body of the email to be dynamically inserted into the Content that will be converted to text.
3. Use AI to categorize the email, returning a JSON response.
Add another action to the flow. Select the action named Run a prompt.
In the Settings, for the new action, under the Parameters tab, click the drop-down arrow under Prompt and select New custom prompt.
Insert the following prompt into the Instructions textbox:
You are an assistant that categorizes inbound emails.
Your task: Analyze the email subject and body, then return ONLY valid JSON that matches this schema:
{
"intent": "quote_request | purchase_order | other",
"confidence": 0.0-1.0,
"summary": "A one-sentence summary of the email"
}
Definitions:
- "quote_request": The sender is asking for pricing, a quote, or availability for one or more items.
- "purchase_order": The sender is sending a Purchase Order (PO) in response to a quote or pricing you previously sent them.
- "other": Anything that is not a quote request or a purchase order.
Guidelines:
- Always output JSON only, with no explanatory text.
- confidence should be between 0.0 and 1.0 indicating how certain you are of the classification.
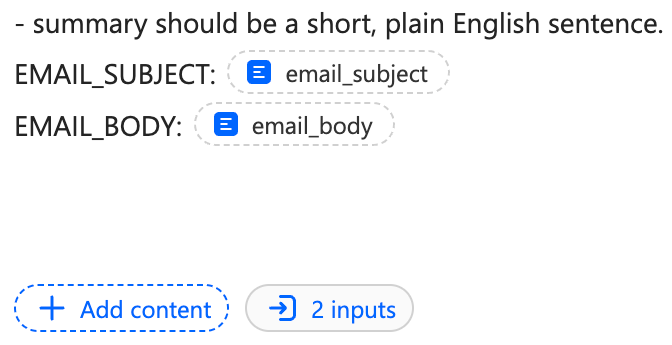
- summary should be a short, plain English sentence.
EMAIL_SUBJECT:
EMAIL_BODY:Tip: This example shows you how you can process purchase orders automatically and respond to customer quotes automatically. Customize the above prompt to your needs. For example, change the list of intents to match the intents that you desire the AI to categorize. When you do so, make sure you modify the expected JSON schema below in step #4 to match your modifications.
Dynamically inserting the email subject and body into the prompt
You’ll notice that there is no text after the EMAIL_SUBJECT and EMAIL_BODY tags in the above prompt.
Place your cursor after the words EMAIL_SUBJECT in the prompt, add a space, and then enter a forward-slash “/” character. Doing so will bring up a context menu that looks like the following:

Select Text to choose a text input, then name the input email_subject. (You do not need to enter any sample data). Click Close on the context window.
You’ll notice a new placeholder inserted in the prompt next to EMAIL_SUBJECT with the name email_subject, and at the bottom of the Instructions textbox you will see ‘1 input’.
Follow the same pattern to add another Text input named email_body next to the text EMAIL_BODY. Now you should see ‘2 inputs’ at the bottom of the Instructions textbox:
Click Save at the bottom right of the screen.
The two inputs (Email_body and Email_subject) are now available to be set under the Parameters tab:

Click in the text box for Email_body, click the blue lightening bolt icon and select The plain text content output from the previous step Html to text.
Select the Subject from the When a new email arrives (V3) action as the dynamic content for the Email_subject.
4. Parse the JSON returned from the LLM
Add a Parse JSON action to the flow.
Tip: Actions can be conditionally called upon success or failure of previous actions. For complicated actions that have a chance of failure (like the Run a Prompt action above), condition the next action to only fire upon a successful completion of the previous action. When hardening this solution for production, consider changing the Setting for the Parse JSON action to only fire if the Run a Prompt action is successful. Define another action to handle the error flow if the previous action fails or times out.
Under its Parameters, select the Text output from the Run a Prompt as the dynamic content for the Content parameter.
The other parameter setting of this action needs to describe the JSON schema that should be expected. Enter the following into Schema:
{
  "type": "object",
  "properties": {
    "intent": {
      "type": "string",
      "enum": ["quote_request","purchase_order","other"]
    },
    "confidence": { "type": "number" },
    "summary": { "type": "string" }
  },
  "required": ["intent","confidence","summary"]
}Tip: Don’t forget to modify the above schema to match the list of intents that you want to categorize, from step #3 above.
5. Gate on confidence
Add a Condition action to the flow. In its Parameters, click in the box labeled Choose a value, click the blue lightening bolt to insert dynamic content and choose the Body confidence output from the Parse JSON action.
Set the condition is greater than or equal to 0.90.
Tip: Tune this confidence score as needed.

If False: you have several options here. For example, you can put no actions below this condition to basically ignore emails that arrive in the monitored folder that the AI was not highly confident matched a specified intent. Or, you could add actions here to move the email to another folder for a human to review.
If True: continue to the next step, Switch on intent.
6. Switch on intent
Add a Switch action to the flow under the True condition.
In the On parameter, click in the box labeled Choose a value, then click on the blue lightening bolt and select Body intent from the Parse JSON action as dynamic content.
In the Map View, there is a “+” button below the Switch action, as well as a Default case.
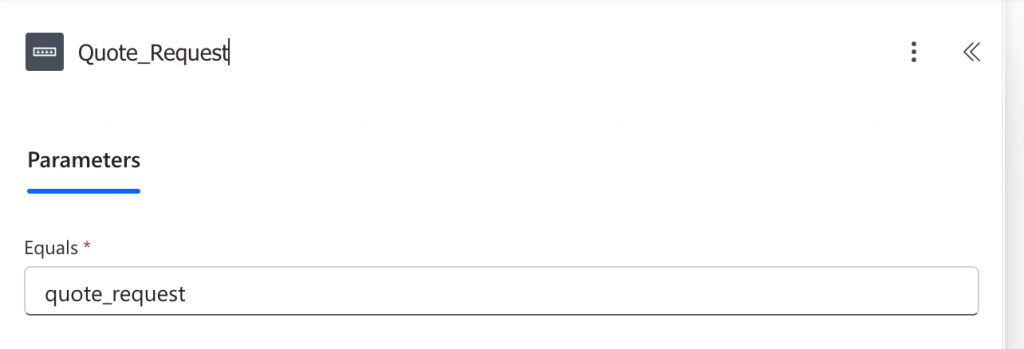
Click the “+” button to the left of the Default case to add a case. In the Equals parameter, enter one of the intents, such as “quote_request”.
Tip: For readability in the Map View, click ‘Case’ to change the name of the case from ‘Case’ to ‘Quote_Request’.
Follow the same pattern to add the other cases below the Switch action, for example, “purchase_order”.
7. Continue the flow for each intent
Click the “+” button under each intent (and potentially the ‘Default’ case too) to perform your desired actions for each intent. An excellent next step in the flow may be to extract a list of items from the content. Refer to the article How to Extract Items and Quantities from Emails, PDFs and Excel using AI to learn how to perform that step.
Summary
This post has shown how to achieve Office365 email automation using Microsoft Power Automate and AI to automatically classify incoming emails by intent—such as quote requests, purchase orders, or other messages. This method of AI email categorization will save your business time, reduce errors, and streamline the processes that are triggered by emails.
Leave a Reply